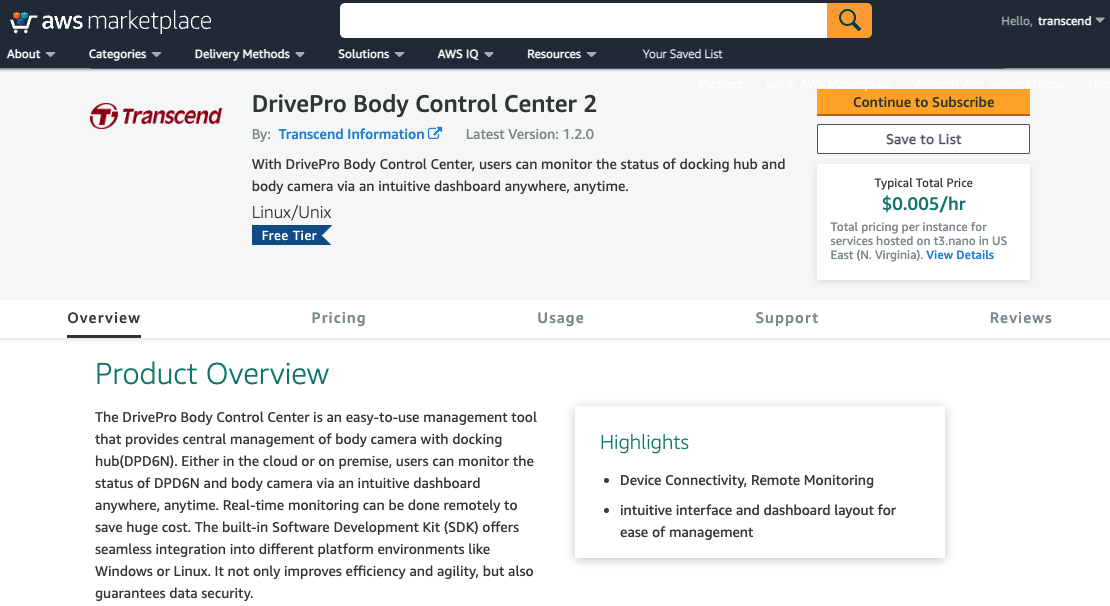
DrivePro Body Control Center (AWS Marketplace)
Step 1: Subscribe DrivePro Body Control Center from AWS Marketplace
Link: https://aws.amazon.com/marketplace/pp/prodview-6szgksi7qzp7s
Please enter to AWS Marketplace and click on the “Continue to Subscribe”
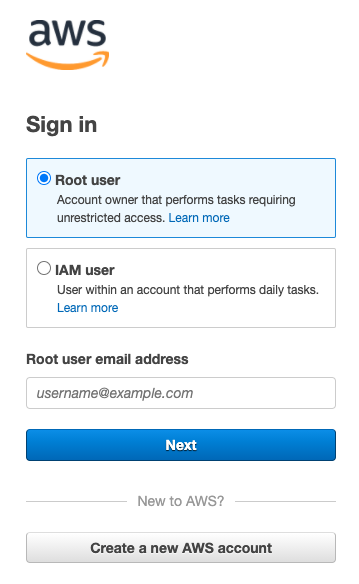
Sign in your AWS account.
Click on the “Continue to Configuration”
Configure this DrivePro Body Control Center software and click on the “Continue to Launch”
- Delivery Method: 64-bit (x86) Amazon Machine Image (AMI)
- Software Version: <latest_version>
- Region: Select the Region that the nearest to your location.
Launch this DrivePro Body Control Center software
- Choose Action: Launch from Website
- EC2 Instance Type: t2.large (Recommand select higher than t2.large for better performance.)
- VPC Settings: default vpc
- Subnet Settings: default subnet
-
Security Group Settings:
- Create a security group based on our setting, enter name, description of this security group.
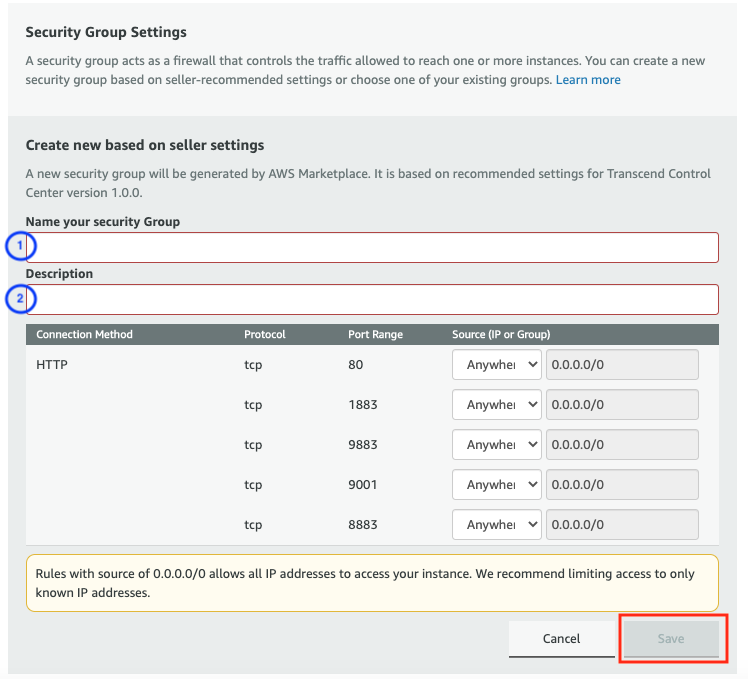

- Create a security group based on our setting, enter name, description of this security group.
-
Key Pair Settings:
- Create a key pair in EC2, enter name and select file format as “pem”. The key pair used to access EC2 instance.

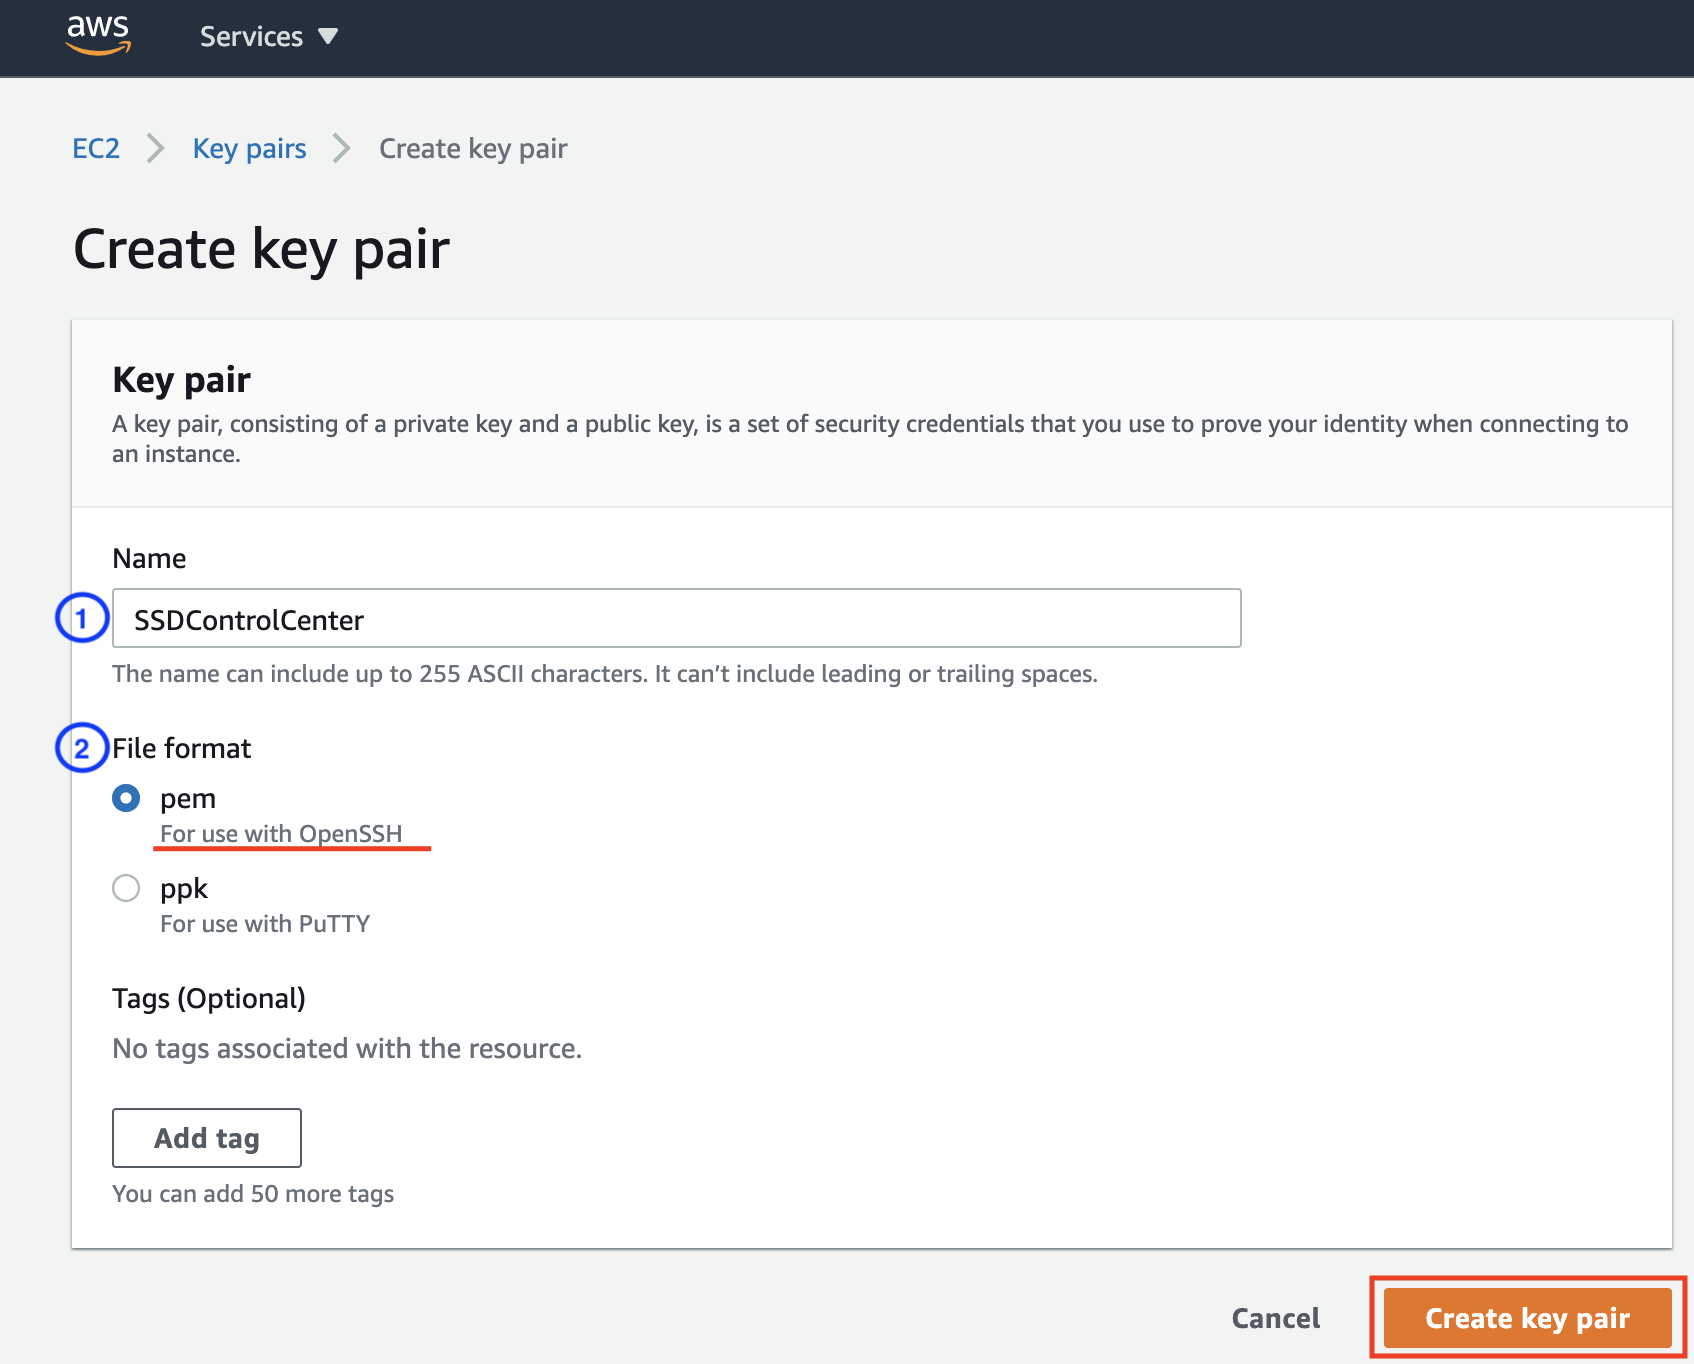

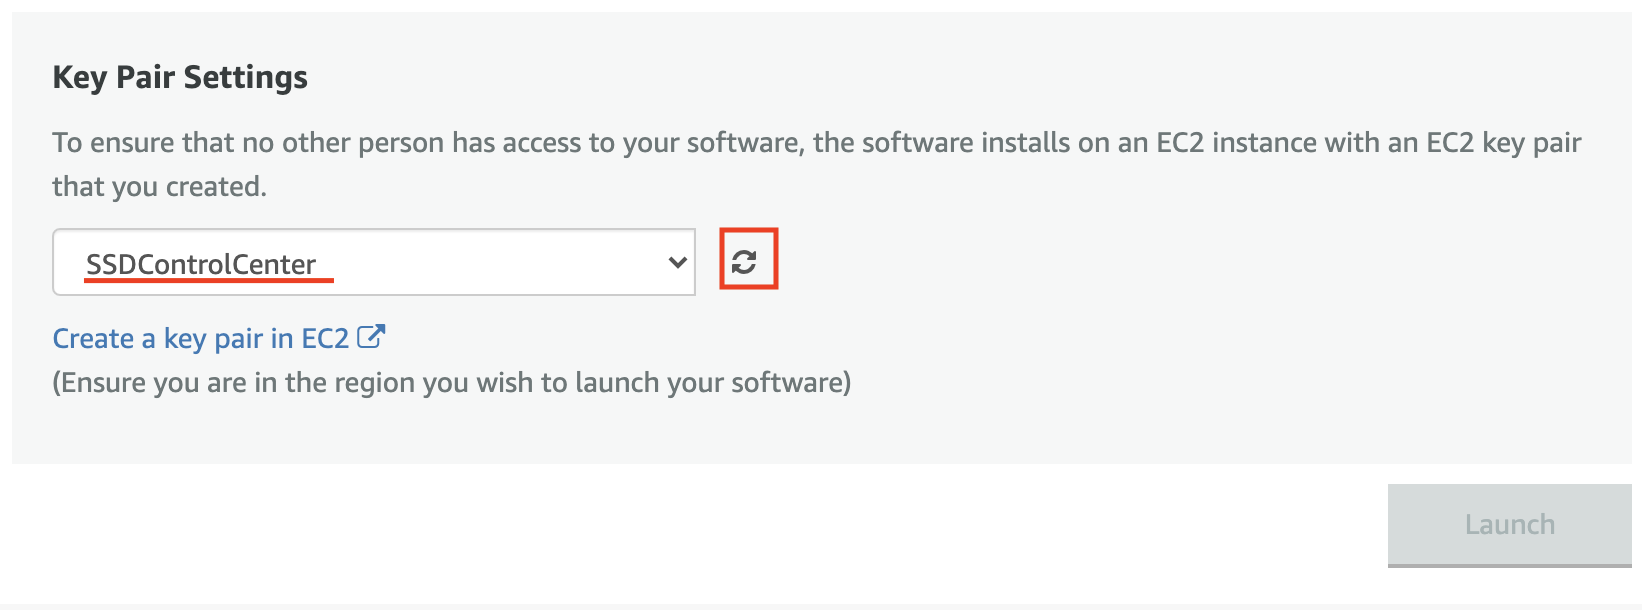
- Create a key pair in EC2, enter name and select file format as “pem”. The key pair used to access EC2 instance.
-
Click on the “Launch” to deploy EC2 machine.
Step 2. Login DrivePro Body Control Center Web Service
Open the browser and enter http://serverIP to DrivePro Body Control Center main page (Suggest using Google Chrome for best experience).
Note: Server IP can be found on EC2 Console. Select Control Center instance and public IPv4 address is shown in description.

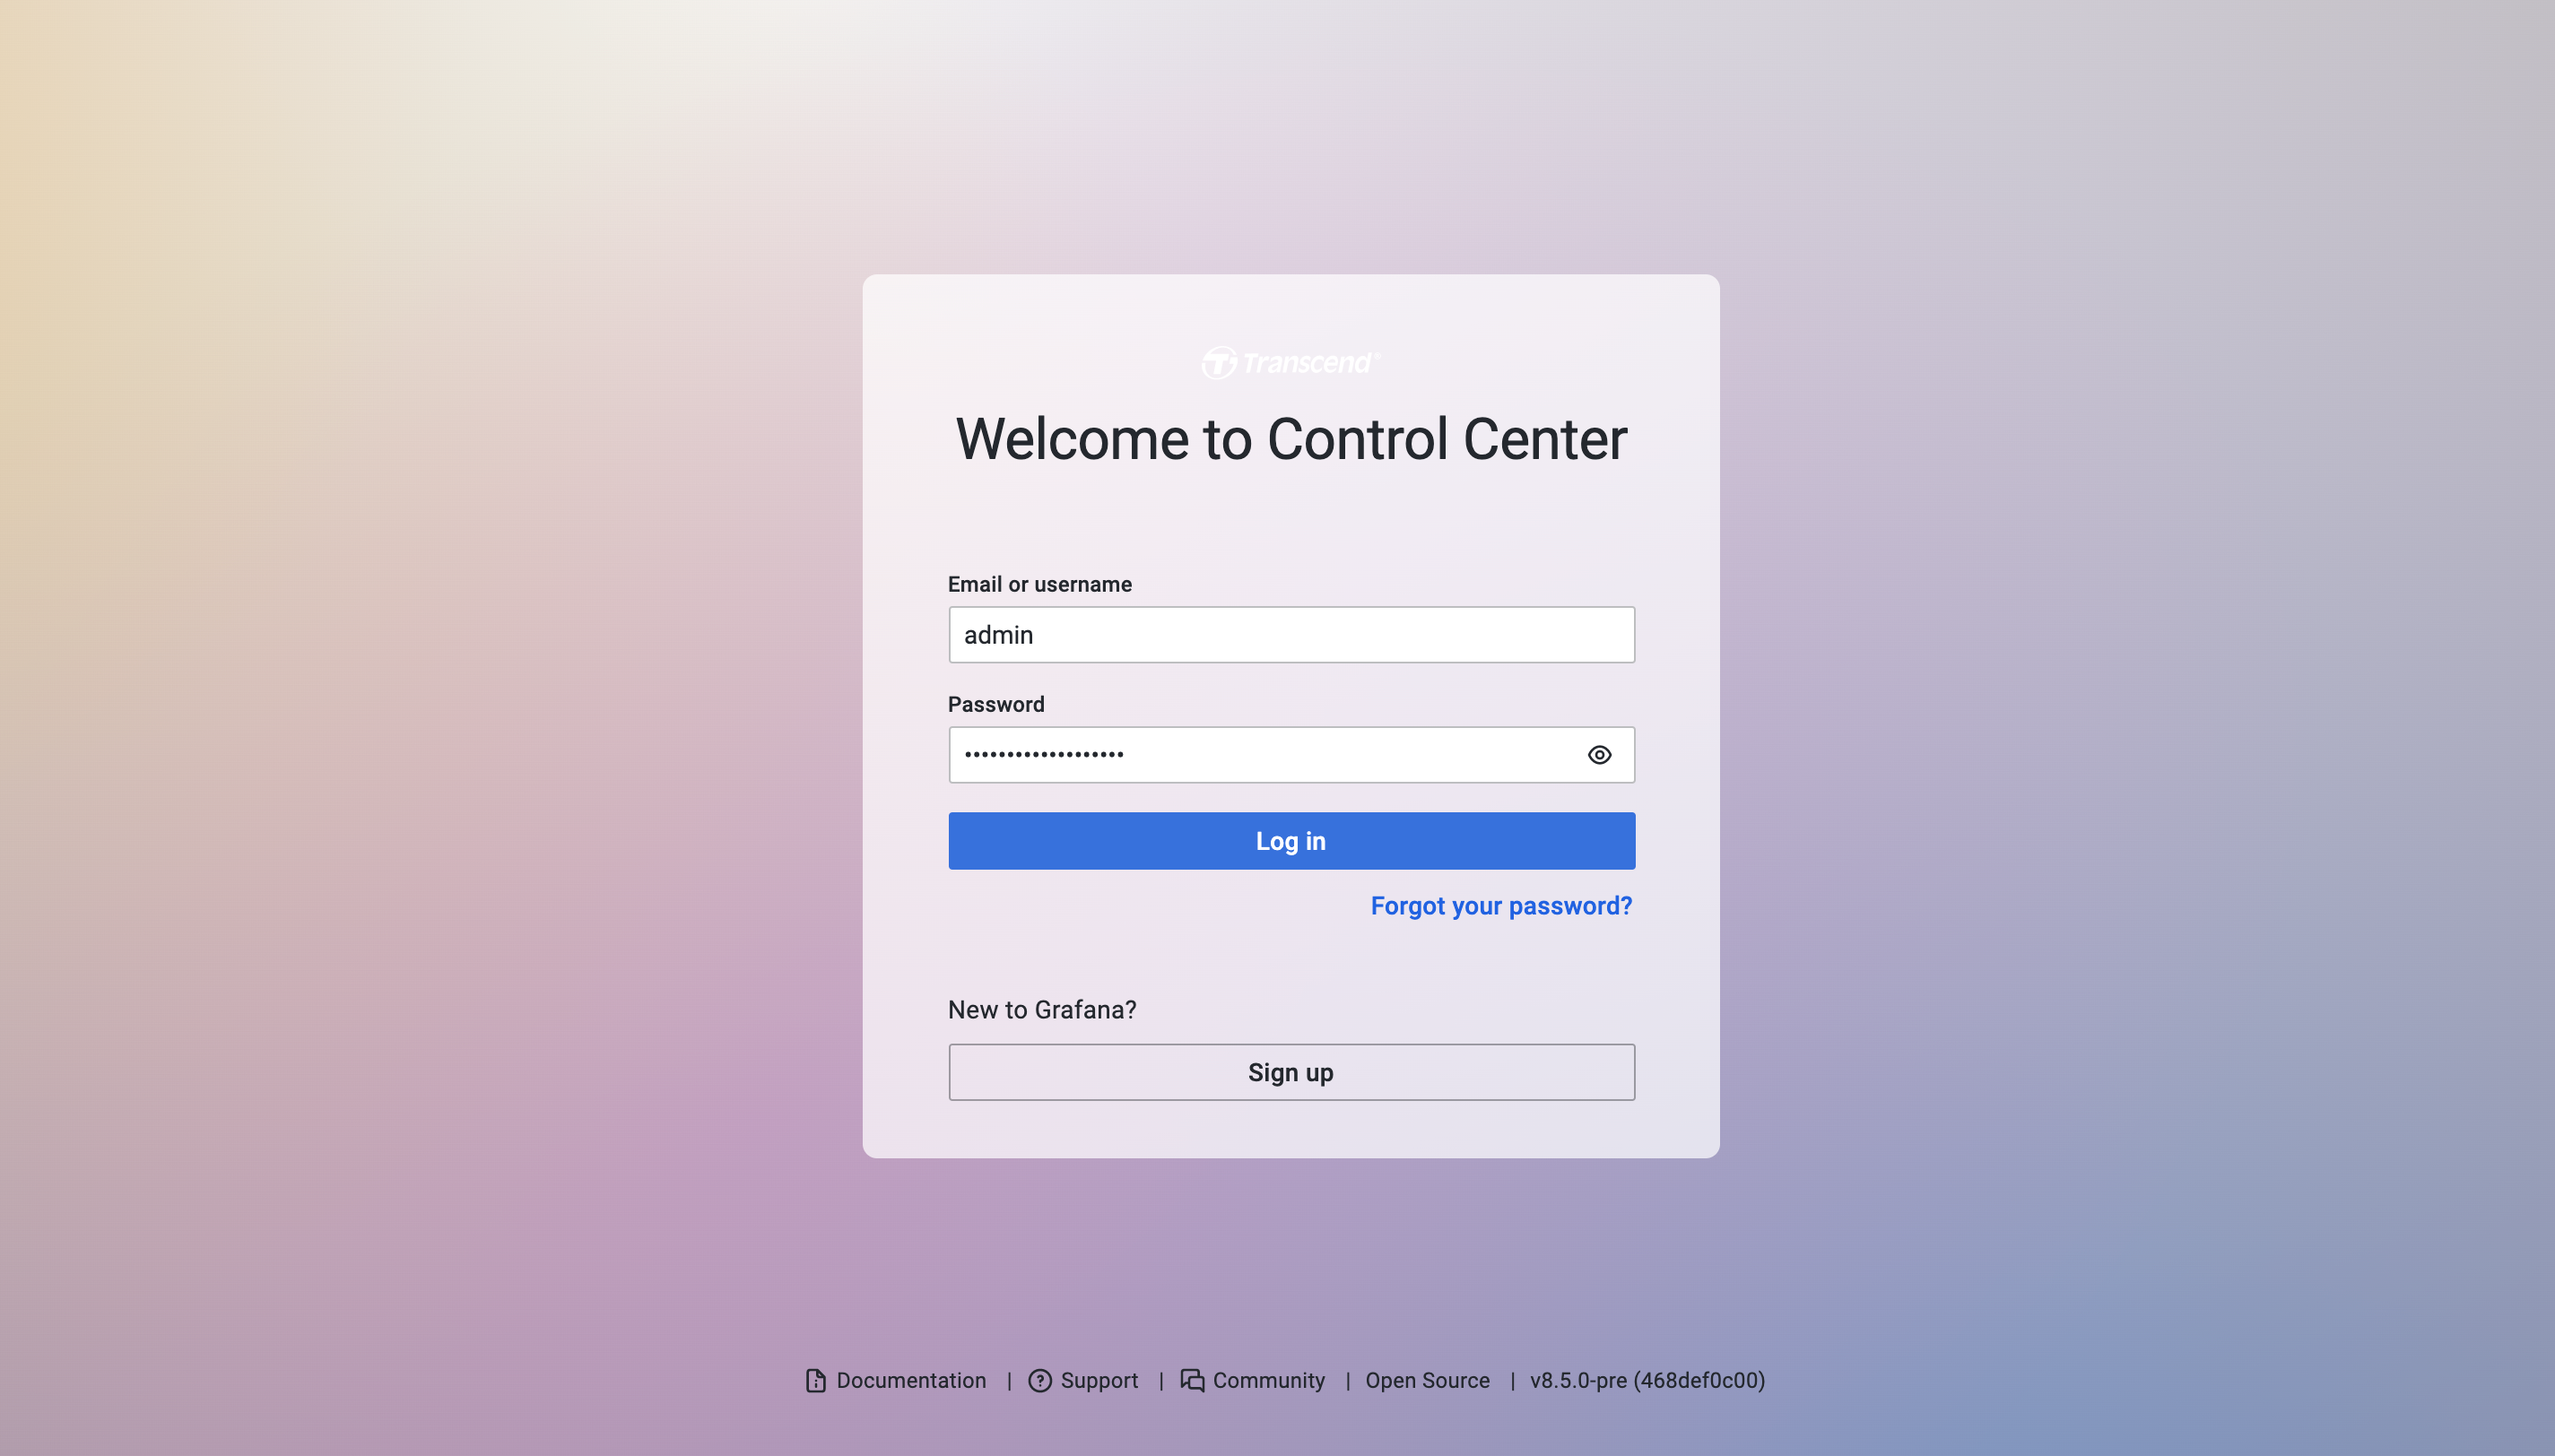
Enter the default account and password
- Username: admin
- Password: <instance_id>
Note: Server IP can be found on EC2 Console. Select Control Center instance and instance id is shown in description.

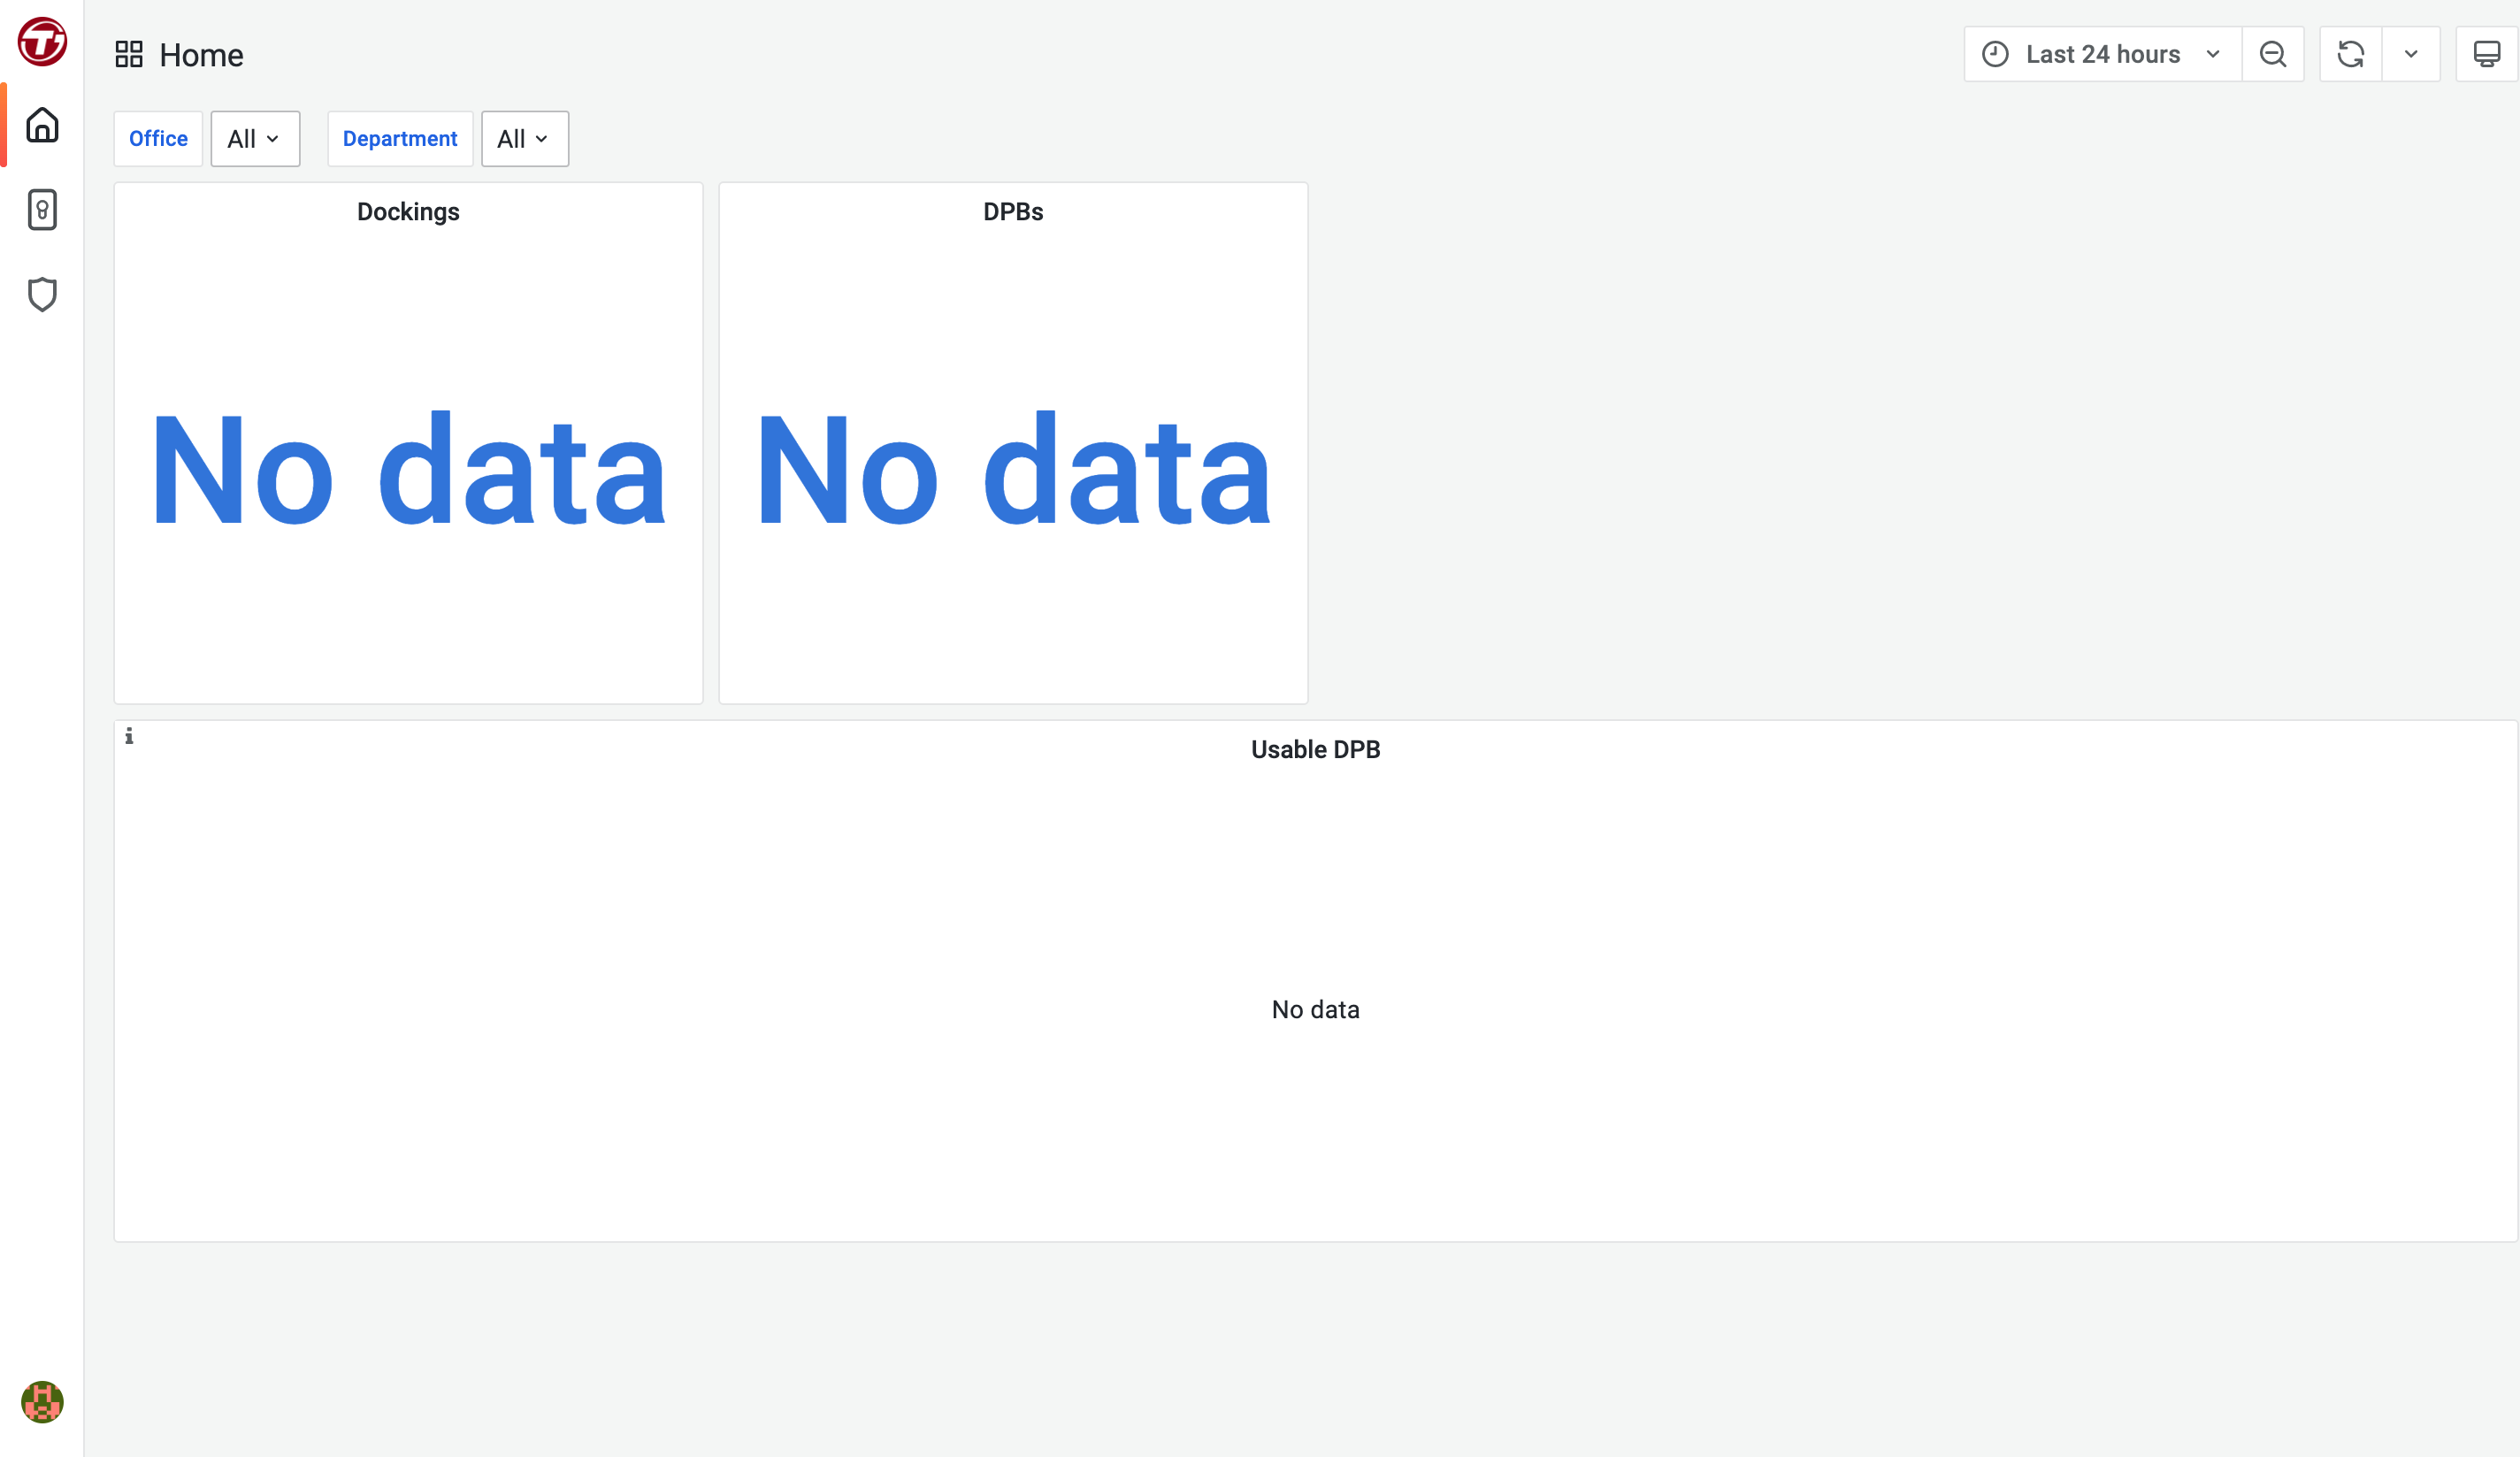
Main dashboard page will be shown after log-in. Binding with docking station by configture webpage [Step 3]
Step 3. Binding docking station(DPD6N)
About docking station
DPD6N, a product of Transcend. For more information, please refer to Transcend's official website.
Binding step
-
Setup hardware and login to configture page. More detail step, please check DPD6N User's Manual
-
Turn on
Control Center Settingsitem at webpage, setup Server IP, office name and department name and save it.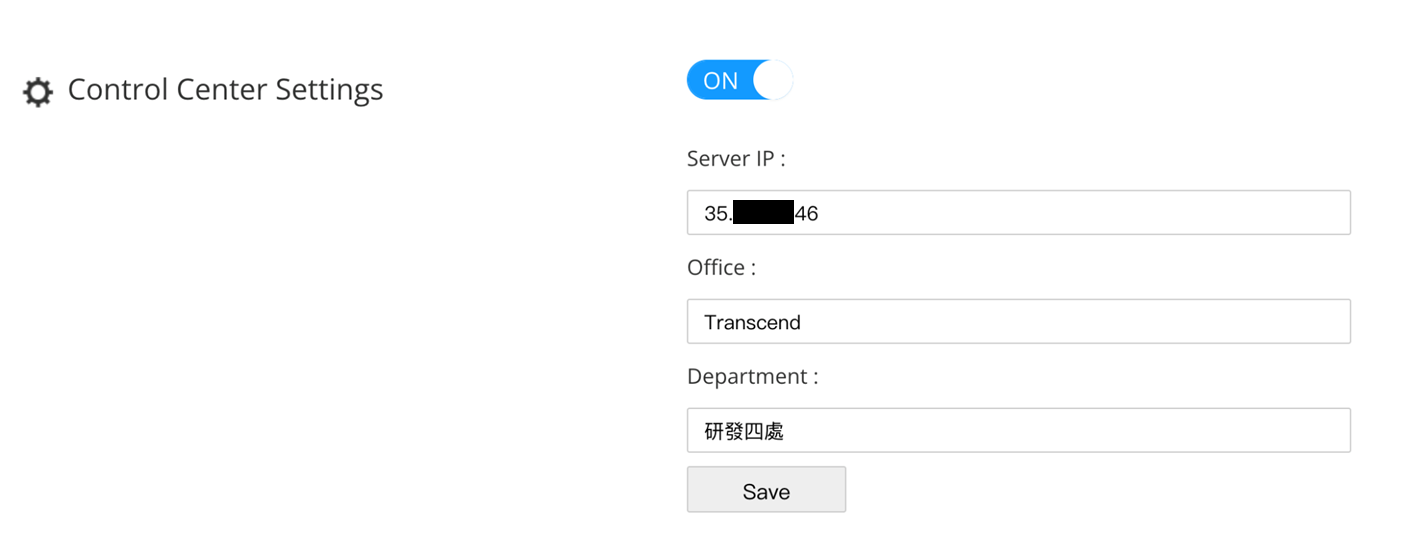
Step 4. Setup Finish
After client is connected, you can see the client information is on Control Center.
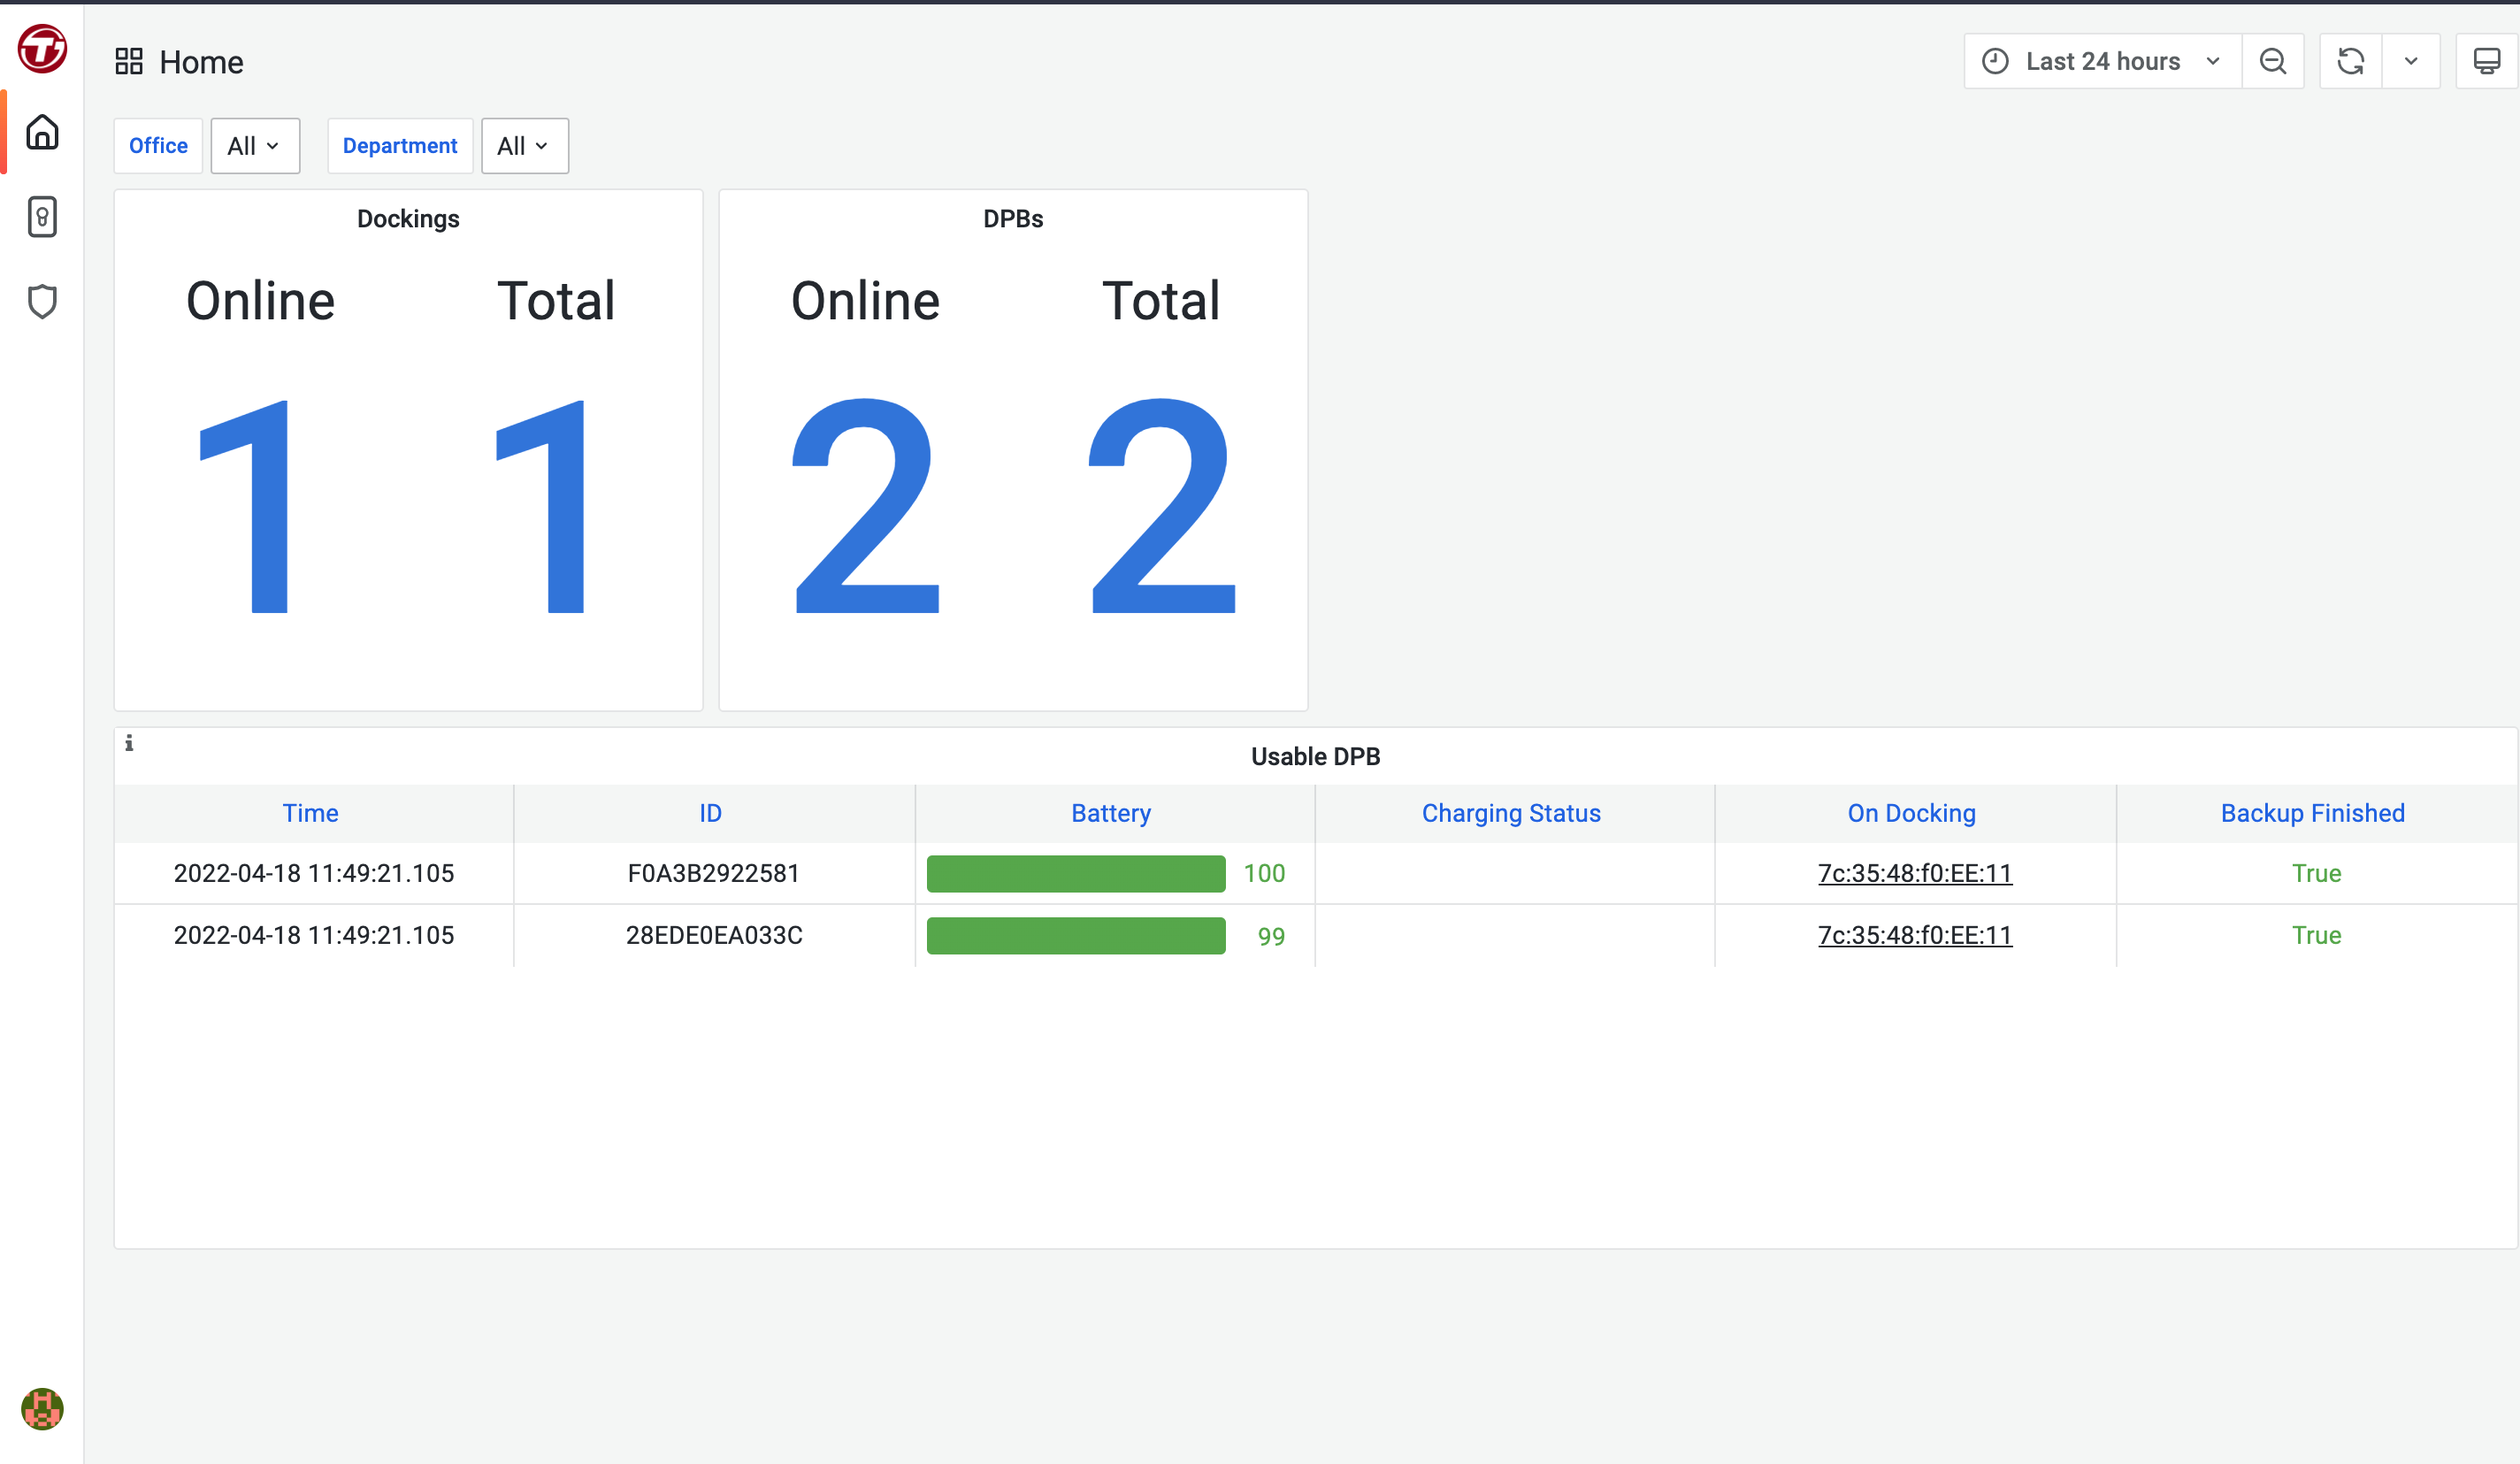
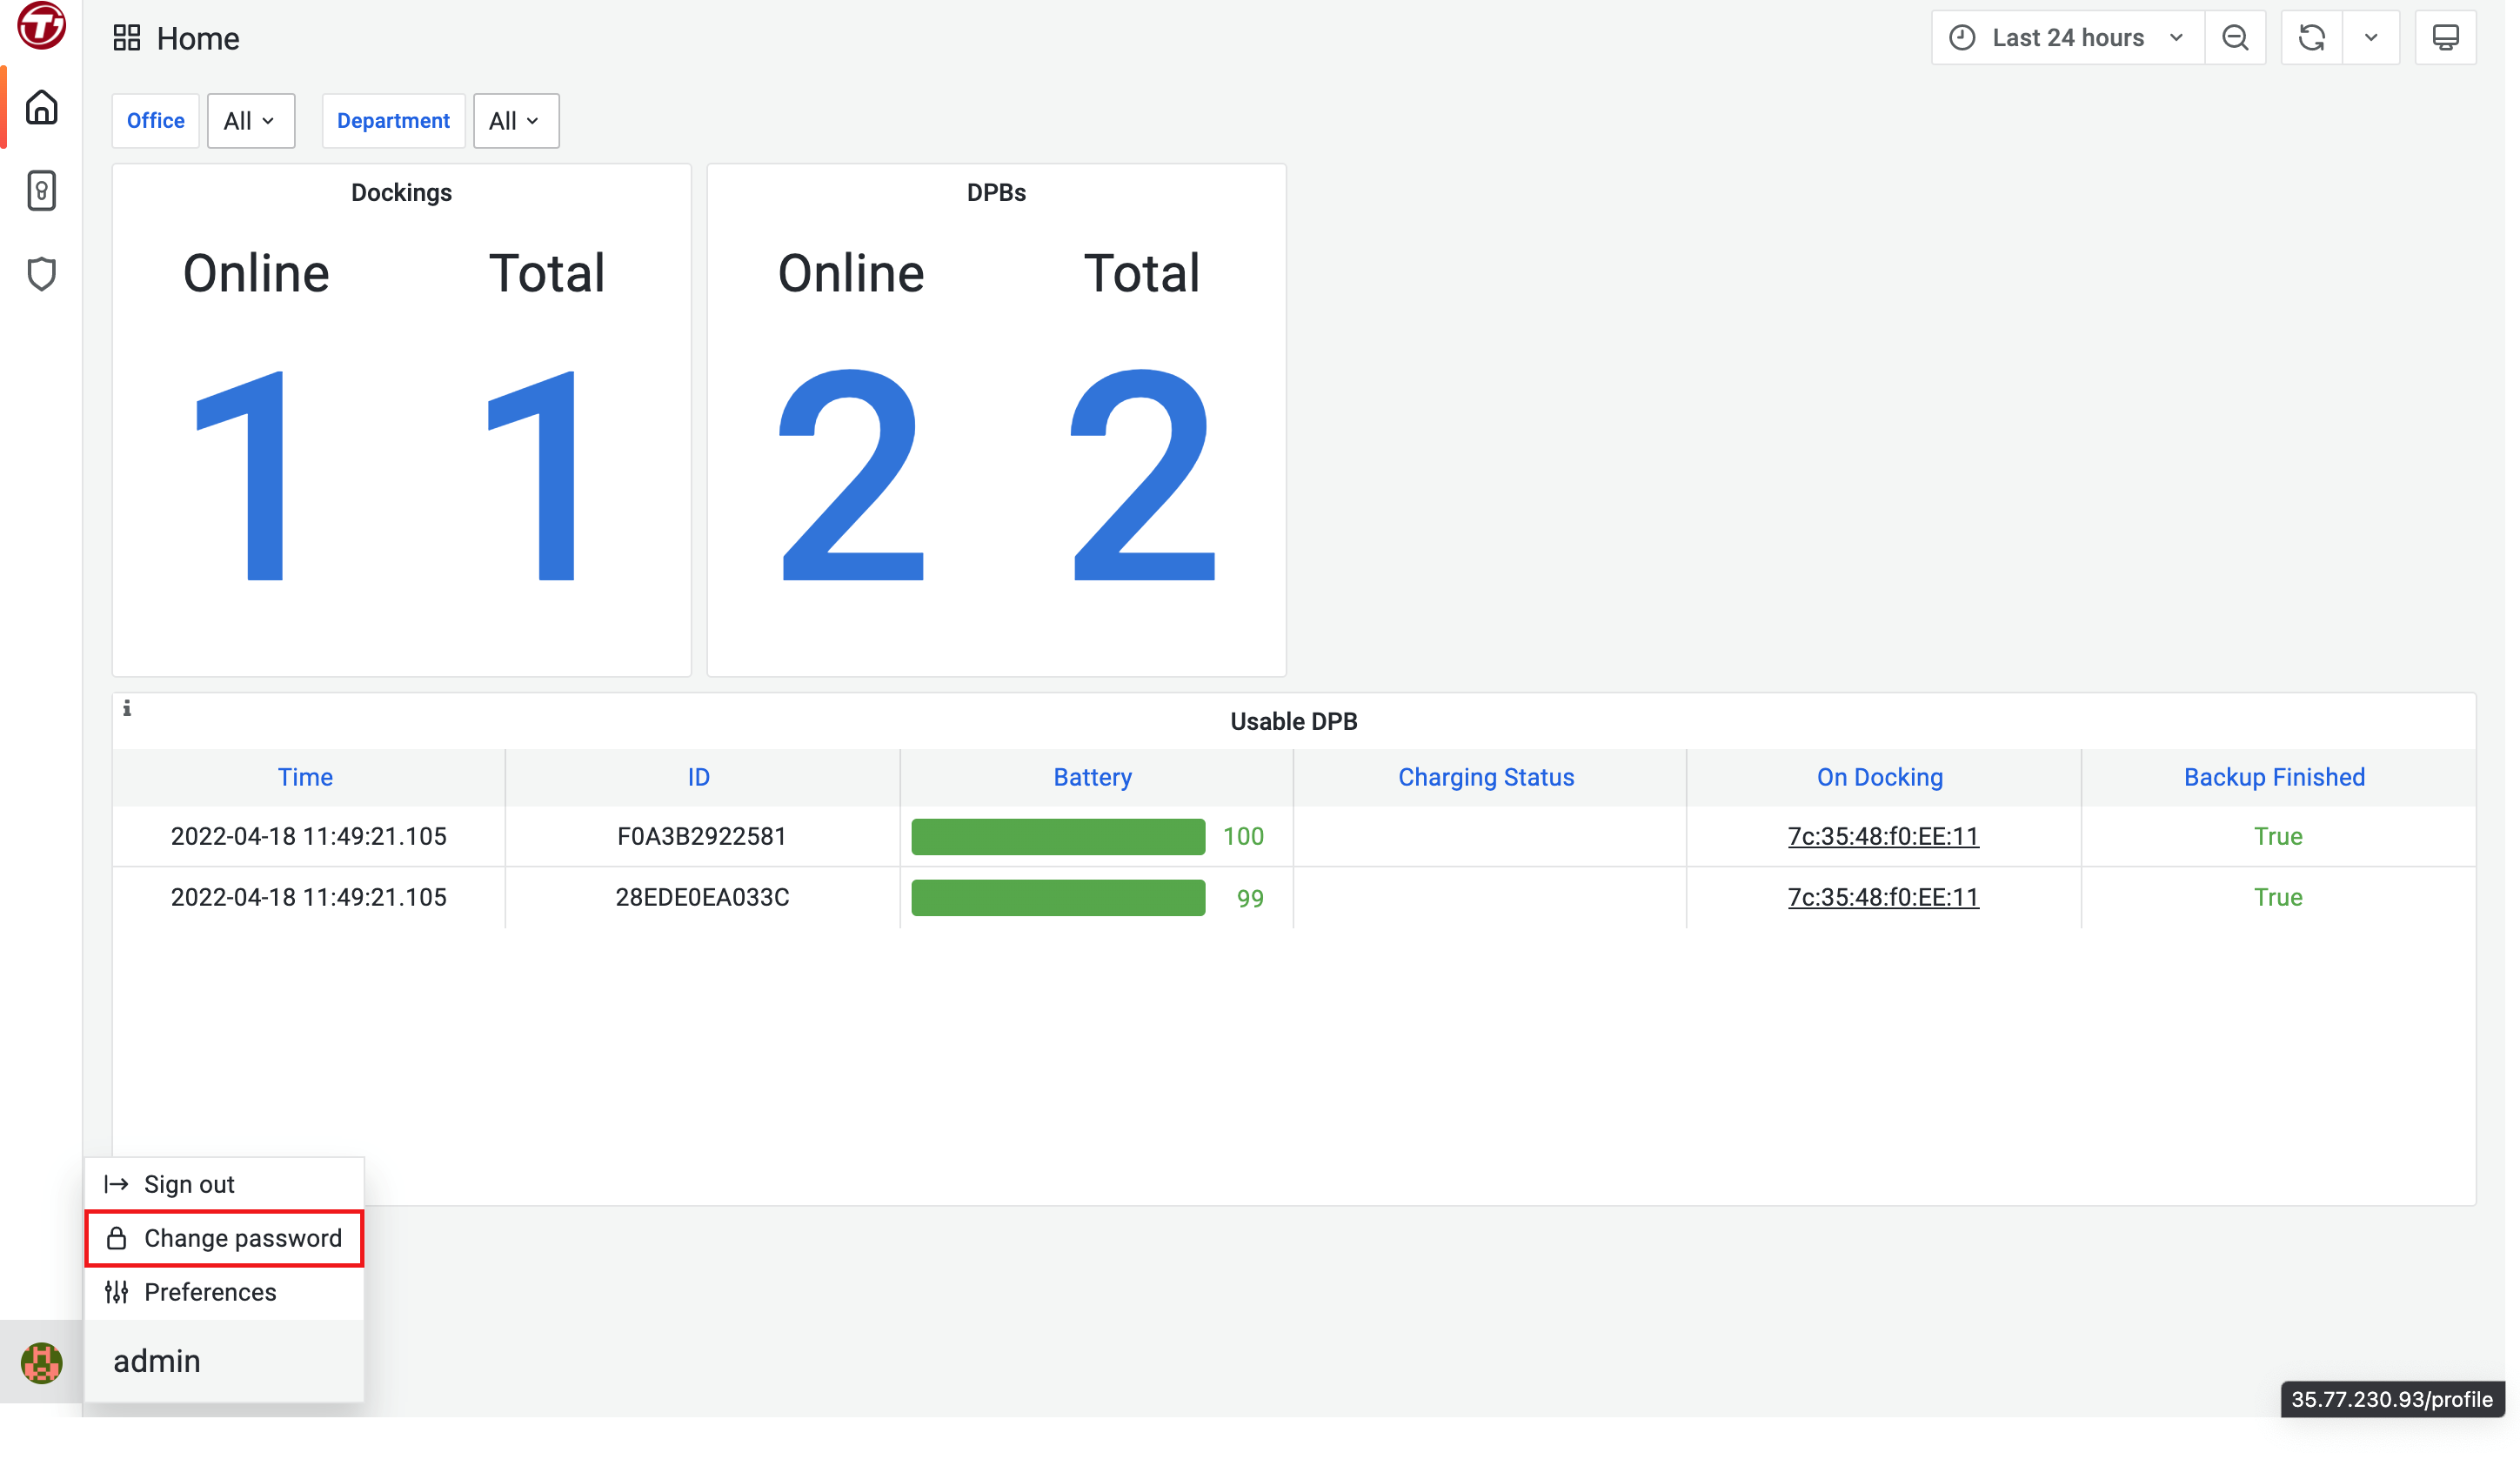
Note: Please remember to modify your own password after log-in.
[Optional] Mount your S3 bucket:
The streaming media will be store in EC2 storage by default. However, you can mount your S3 bucket to store the streaming media. Follow those steps to setup:
Step 1. Login AWS console, find S3 service
-
Sign in your AWS account.
-
Find S3 service and enter to setup

Step 2. Create your S3 bucket
-
Click the button Create Bucket

-
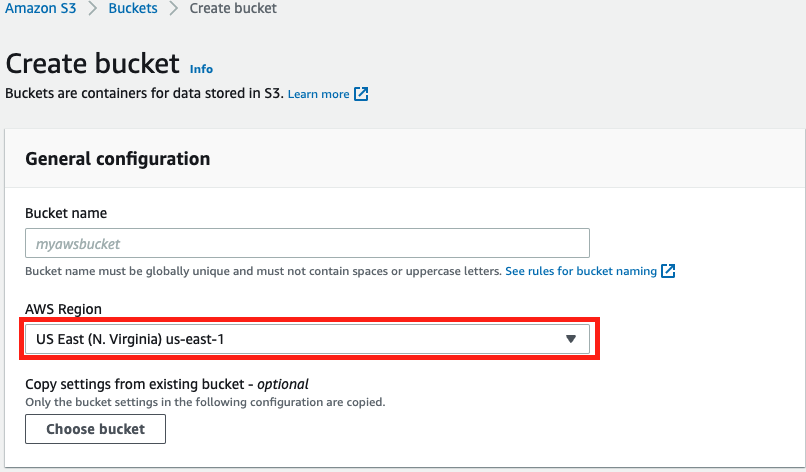
Select the same region as your Control Center.
-
Click the button Create Bucket

-
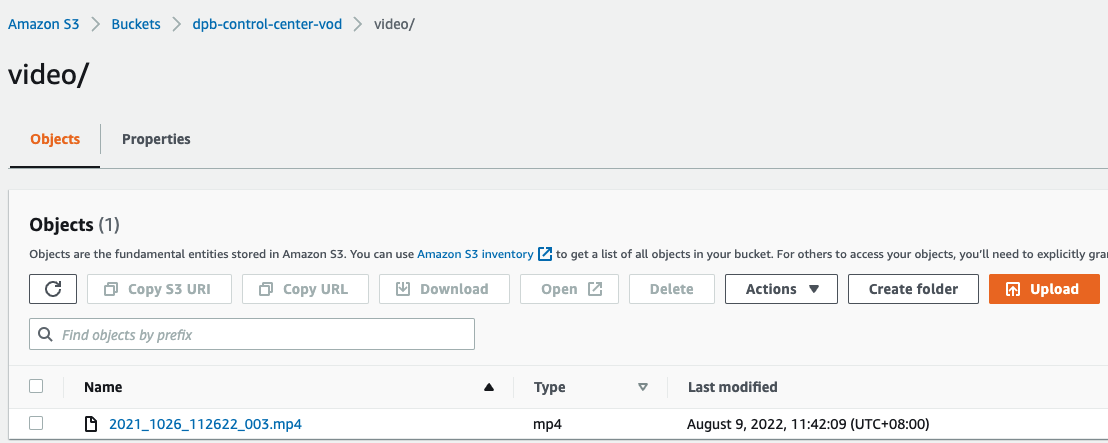
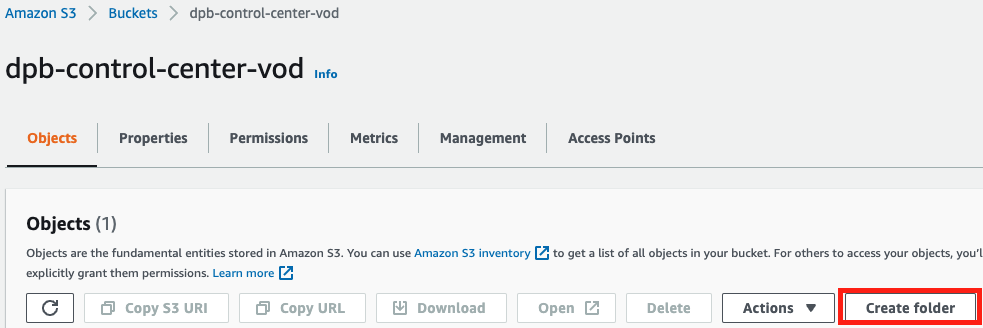
Enter your bucket and click Create folder
-
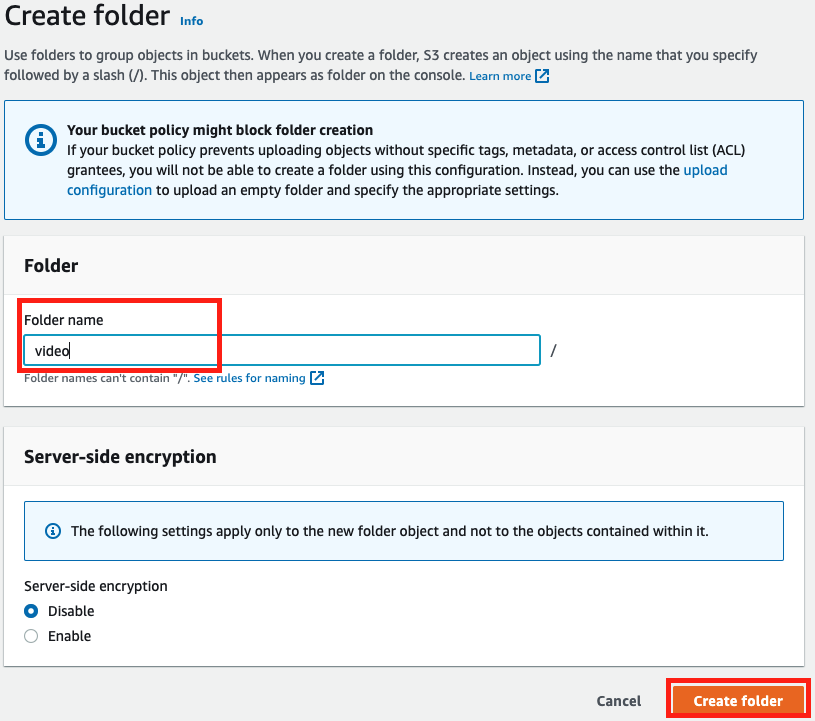
Give a folder name "video" and click Create folder
Step 3. Create IAM role to DrivePro Body Control Center
-
Find S3 service and enter to start configure

-
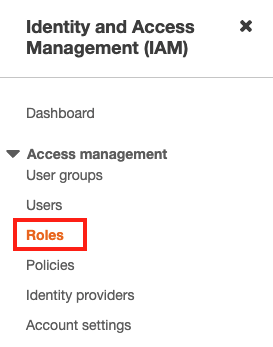
Click Roles in the left navigation panel, and choose Create Role

-
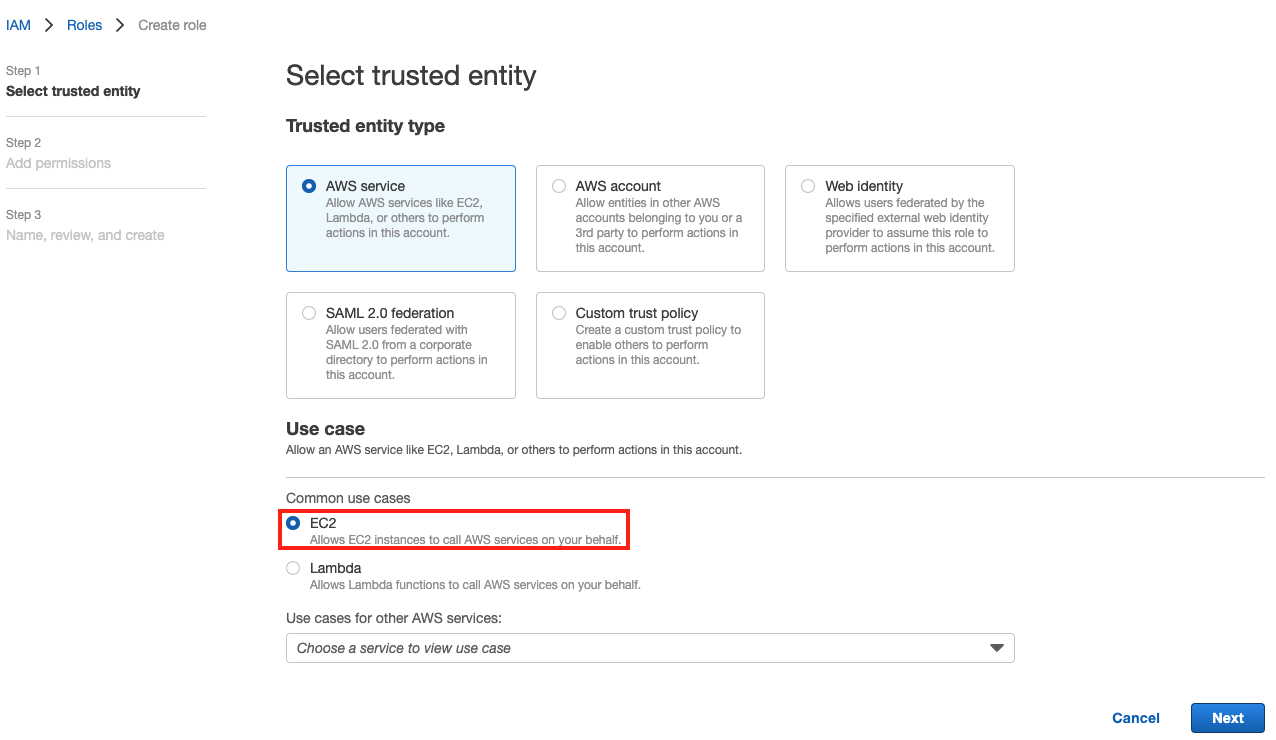
In "trust entity" step, choose AWS service as trusted entity. In use cases section, select EC2 and then click Next
-
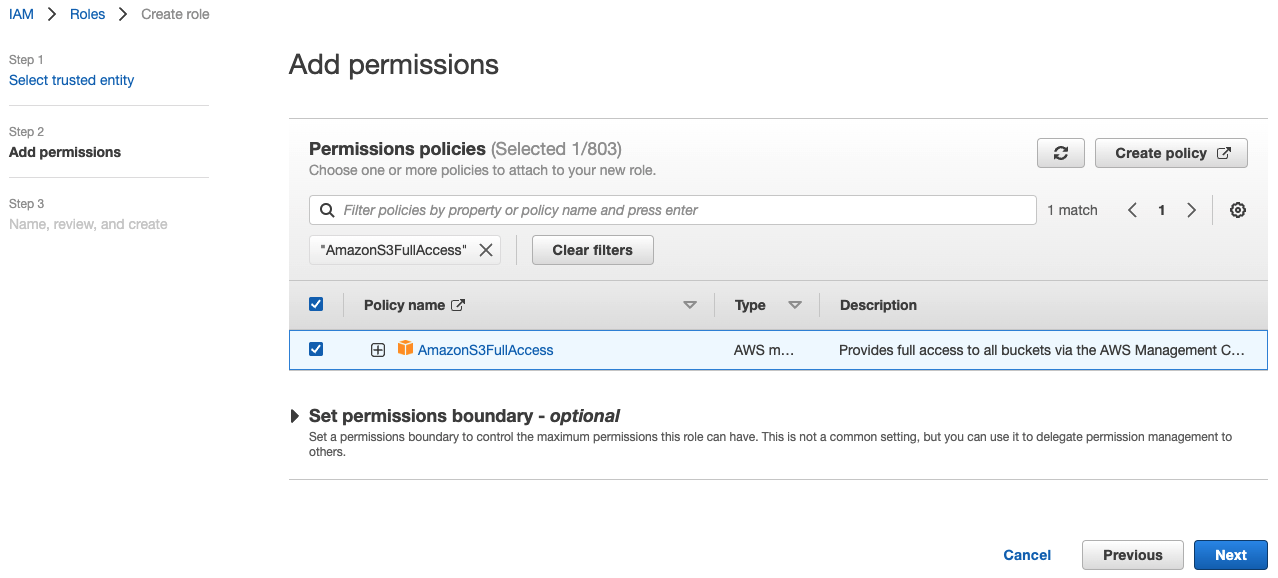
In "add permission" step, search and select AmazonS3FullAccess as the permission. Click Next
-
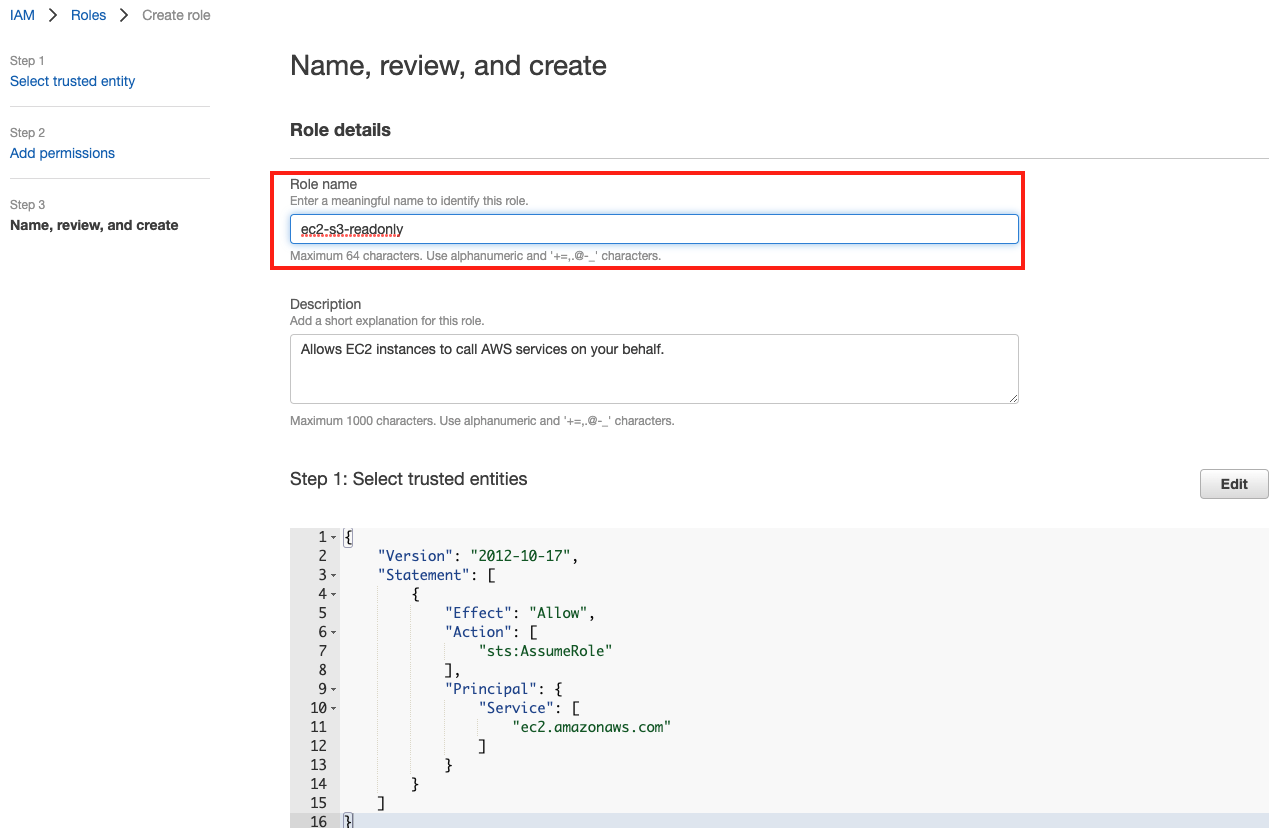
In "Name, review, and create" step, give a name to your IAM role and choose Create role
Step 4. Create IAM role for DrivePro Body Control Center
-
Go to EC2 console, select your DrivePro Body Control Center instance.
-
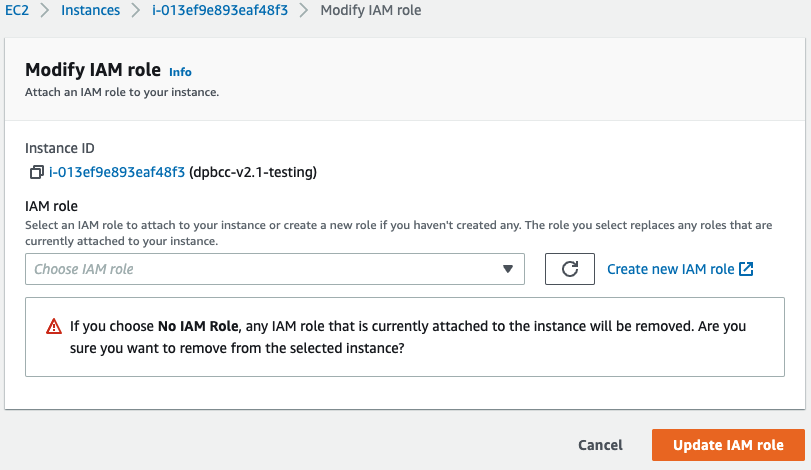
In the navigation pane, choose Actions->Security->Modify IAM role. Select the IAM role you just created.

Step 5. Connect to your DrivePro Body Control Center
- Open the Amazon EC2 console at https://console.aws.amazon.com/ec2/
- In the navigation pane, choose Instances.
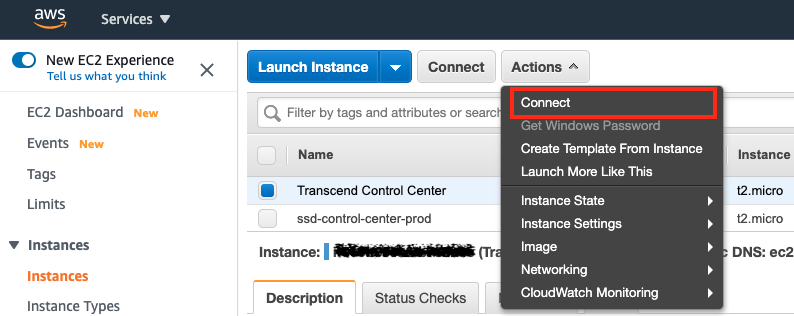
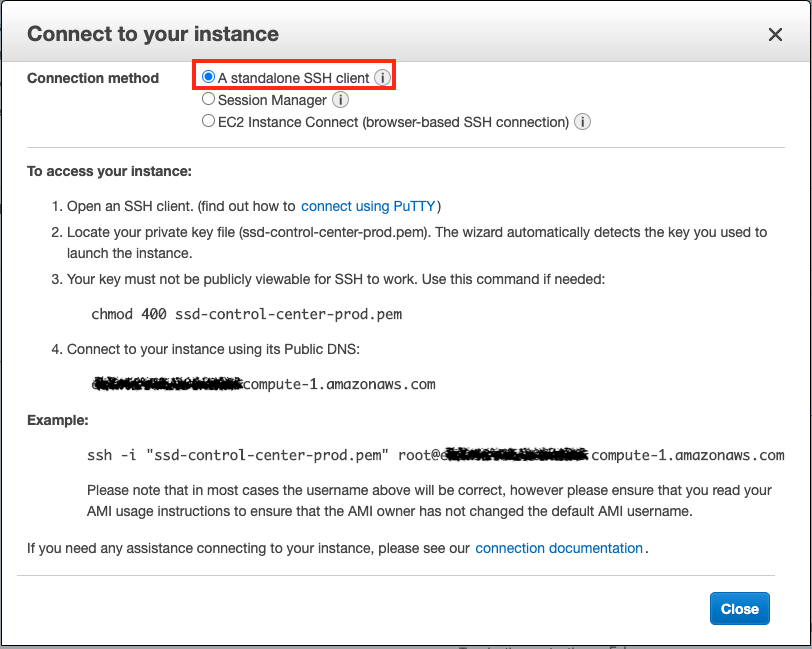
- Select the instance and choose Connect.
-
For Connection method, choose A standalone SSH client. Follow the instruction to connect your instance. For more information, please see the connection document
Note: Your instance user name is ubuntu.
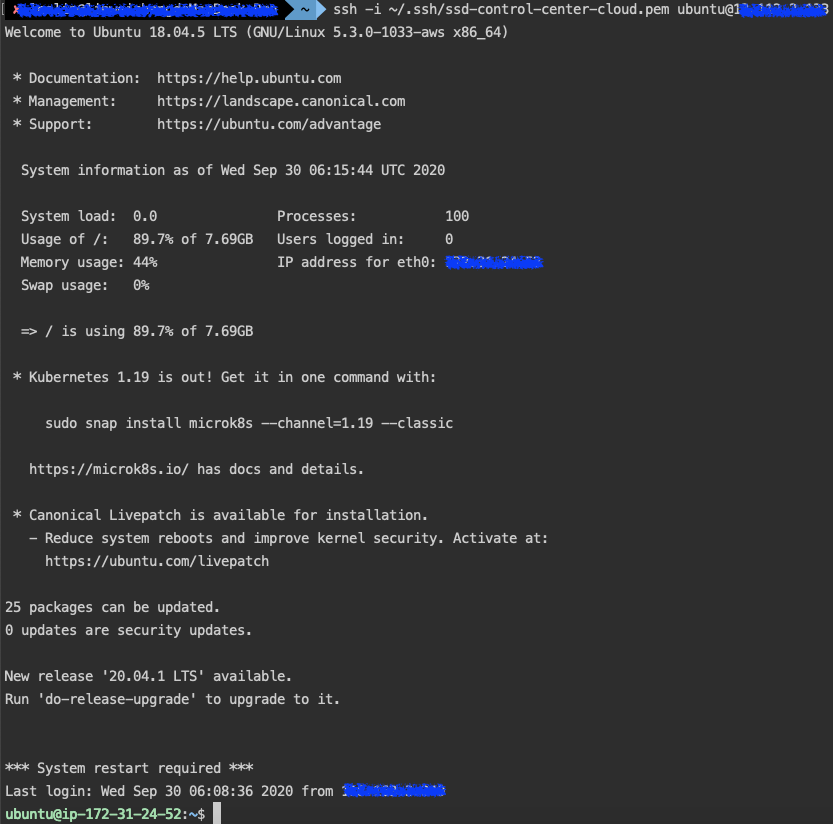
 5. You will see the following content on terminal after connecting successfully.
Step 6. Mount your S3 bucket on DPB Control Center
Enter the following command in terminal to mount a S3 bucket:
  sudo s3fs -o iam_role=<your_iam_role_name> -o url=https://s3.<aws_region_code>.amazonaws.com \
  -o endpoint=<aws_region_code> \
  -o curldbg \
  -o allow_other,use_path_request_style \
  -o use_cache=/tmp \
  -o nonempty <your_s3_bucket_name> /mnt/s3-drive
- aws_region_code is the region code that your bucket is created at. e.g. ap-northeast-1
After mounting S3 bucket, the streaming media will be stored directly in video or photo folder in your S3 bucket
